
Picture this: your garden, patio, or even a cozy corner indoors, brought to life with the gentle, calming sound of flowing water. It's a wonderful feeling, a little slice of peace right where you live. For many folks, adding a water element feels like a big project, maybe too expensive, or just a lot of work. But what if you could create something truly special, something unique, and do it all while being kind to the planet and your wallet? That's where an upcycled DIY water feature steps in, offering a clever way to bring that tranquility home.
Today, more and more people are looking for ways to make their homes and outdoor spaces feel more personal, more inviting. There's a real joy in making something with your own hands, especially when it gives old things a fresh start. An upcycled DIY water feature is, in a way, the perfect blend of creativity, environmental care, and smart spending. It's about seeing possibility in what others might overlook, turning something discarded into a treasure.
We're talking about giving items a second life, making them into something much better than they were before. This idea, which many people call "upcycling," means taking something no longer in use and giving it a new purpose, a new function. It is a process of creating an object of greater value from a discarded item. This movement has grown quite a bit, stemming from a growing care for our environment and a desire to make things last. So, let's explore how you can make your very own water feature, giving old things a fresh purpose and adding a lovely touch to your surroundings.
Table of Contents
- What is Upcycling, Really?
- Why an Upcycled Water Feature?
- Getting Started: Planning Your Project
- Inspiring Ideas for Your Upcycled Oasis
- Making It Flow: The Pump and Plumbing
- Care and Keeping of Your Eco-Friendly Fountain
- Frequently Asked Questions About Upcycled Water Features
- Your Creative Splash
What is Upcycling, Really?
When we talk about upcycling, it's more than just putting something in the recycling bin. It's about taking something that might otherwise be thrown away, stored somewhere, or simply forgotten, and making it into something better. The meaning of upcycle is to recycle something in such a way that the resulting product is of a higher value than the original item. This could be in terms of its usefulness, its beauty, or just how much you like it. It's about adding value, in the eye of the person doing the work or the person looking at the finished piece.
Think of it like this: you're not just reusing an item; you're transforming it. Upcycling means creating something new from discarded materials by fixing them up, making them look fresh, or giving them a completely different job. It's giving an old item a second life, often with a new, exciting function. So, you're taking old or waste materials and changing them into items with a higher worth, very often through a bit of imagination and skill. Instead of tossing used objects away, we give them a fresh purpose, which is quite satisfying, you know?
The upcycling movement emerged from a growing care for our planet and a desire to live more thoughtfully. It's a process many refer to as "upcycling," which upcyclethat.com defines as "the act of taking something no longer in use and giving it a second life and new function." It's a creative and lasting twist on recycling, changing unwanted items into new, useful products. This approach means taking discarded or unused items and making them into something of greater worth, typically through a good deal of creativity and hands-on effort. This is actually a very big idea for making things last longer.
Why an Upcycled Water Feature?
Choosing to make an upcycled water feature offers a whole bunch of good things. For starters, it's a wonderfully green choice. Instead of buying new materials, which often means more manufacturing and shipping, you're using what's already out there. This helps cut down on waste and reduces your environmental footprint. It's a small step, but a meaningful one, toward living more sustainably, and that's something many people are looking for these days.
Then there's the unique factor. A store-bought water feature can be nice, sure, but an upcycled one? That's truly one-of-a-kind. Your creation will have a story, a bit of history, and a personality that reflects your own creativity. No two upcycled pieces are ever exactly the same, so yours will stand out. This means your garden or patio gets a really special touch, something you can truly be proud of, which is pretty neat.
And let's not forget the cost savings. Building an upcycled water feature can be incredibly budget-friendly. You're using materials you might already have, or things you can find for very little money at thrift stores, yard sales, or even just around your neighborhood. This means you can create a beautiful, calming space without spending a fortune. It's a smart way to get that peaceful water sound without breaking the bank, so it's a very practical choice.
Getting Started: Planning Your Project
Before you grab your tools, it's a good idea to spend a little time thinking about your upcycled DIY water feature. Where will it go? Will it be indoors or outdoors? How much space do you have? These questions help you decide on the size and type of materials you'll need. For instance, a small tabletop fountain needs different things than a larger garden centerpiece. Thinking this through helps a lot, you know, to avoid surprises later.
Consider the overall look you're going for. Do you want something rustic, modern, whimsical, or perhaps a bit natural? This will guide your material choices. A rusty old watering can gives a different feel than sleek ceramic bowls. It's also important to think about the weight of your chosen items, especially if they will hold water. You'll need to make sure your base is strong enough to support everything, particularly when full of water. This planning stage is actually quite important for a smooth project.
Next, gather your supplies. This is where the fun of upcycling really comes in! Look around your home, garage, or even ask friends and neighbors if they have anything they're getting rid of. Yard sales, flea markets, and second-hand shops are also fantastic places to hunt for treasures. You're looking for items that can hold water, or items that can be adapted to hold water, and things that can be stacked or arranged to create a flow. A little imagination goes a long way here, so just let your ideas flow.
Essential Tools and Materials
To bring your upcycled DIY water feature to life, you'll need some basic items. Obviously, you'll need your chosen upcycled objects, like old pots, buckets, teapots, or even old tires. You will also need a waterproof liner if your chosen container isn't already watertight. Pond liners are good for this, or even heavy-duty plastic sheeting. A submersible pump is key; choose one based on the size of your feature and how high you want the water to flow. Most hardware stores have a good selection, and you can always ask for advice there, too it's almost a given.
You'll also need some tubing to connect the pump to where the water comes out. Clear vinyl tubing is often a good choice because it's flexible and easy to hide. For assembly, you might need a drill (with bits suitable for your materials), strong waterproof sealant or silicone, and possibly some adhesive. Don't forget decorative elements like stones, pebbles, glass beads, or even small plants to add to the look. These small touches really make a difference, you see.
Safety glasses and gloves are a smart idea, especially when drilling or working with sealants. Having a level can help make sure your feature sits straight, and a measuring tape is always handy. Sometimes, you might need a hacksaw or other cutting tools, depending on what you're upcycling. Having a clear workspace is also helpful, so you can spread out your materials and work comfortably. This makes the whole process a lot more pleasant, actually.
Inspiring Ideas for Your Upcycled Oasis
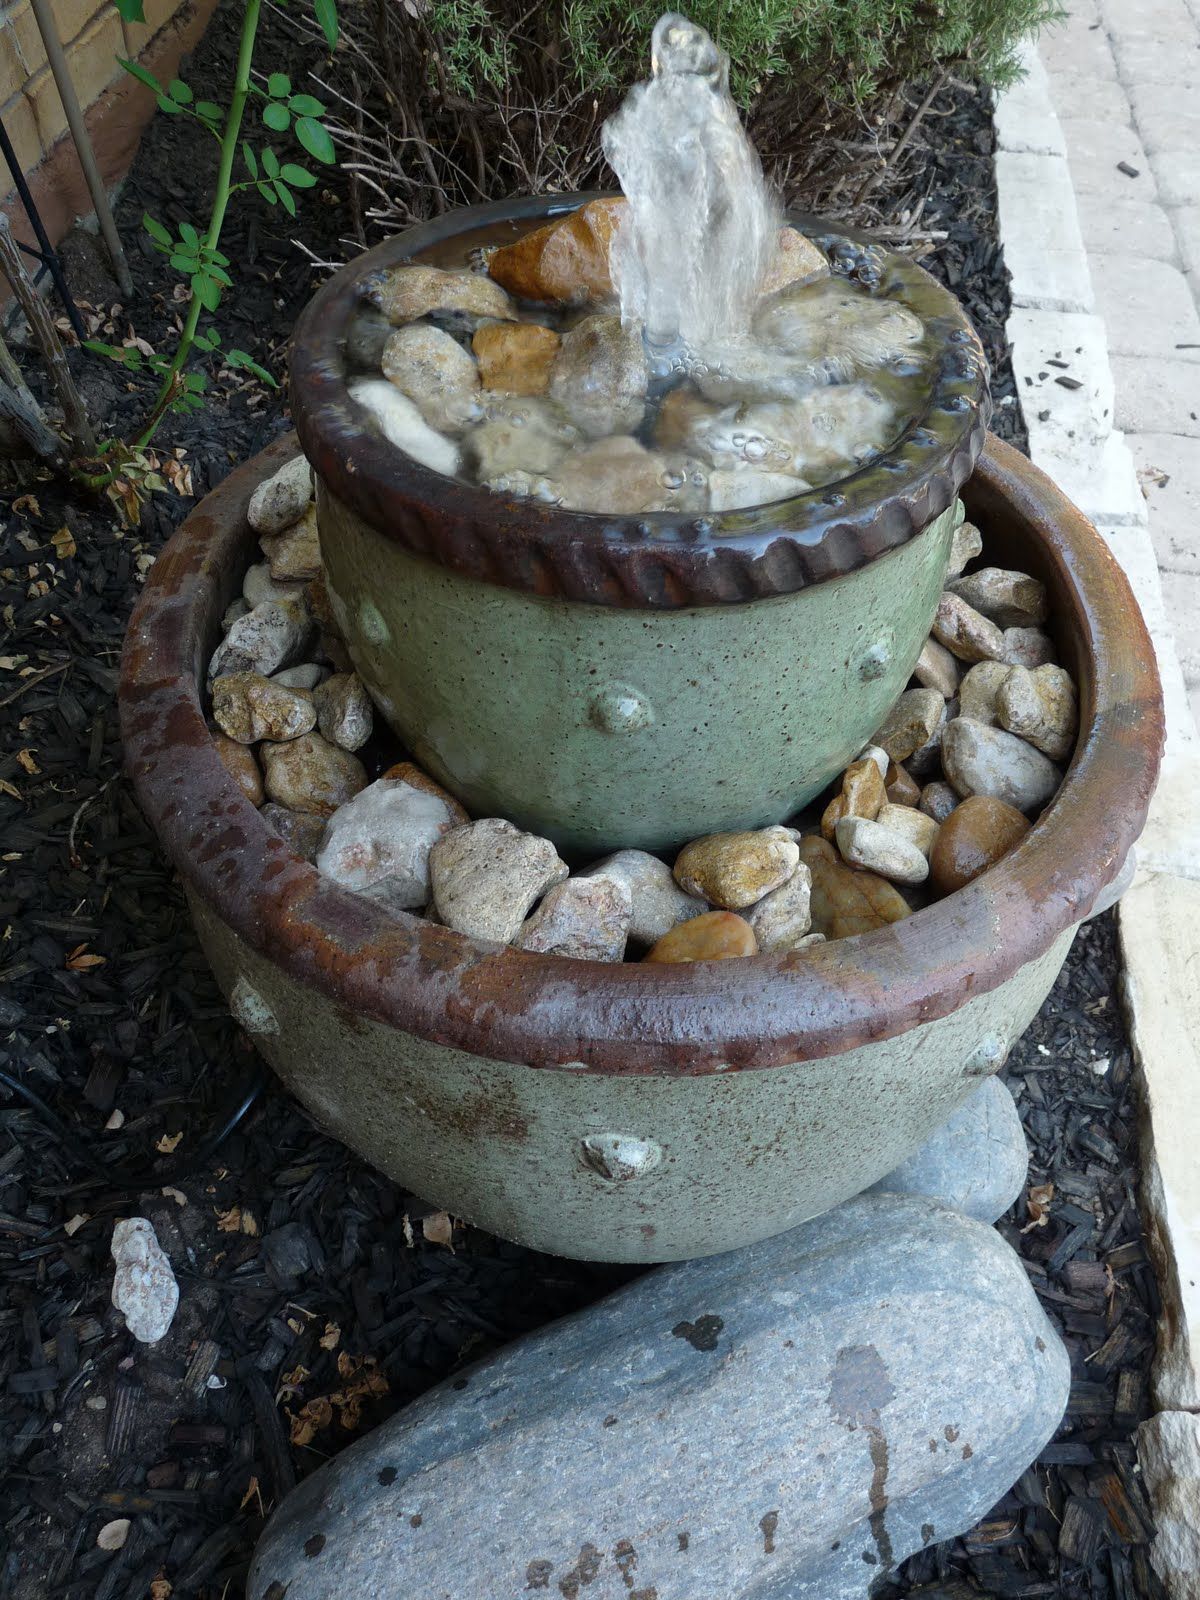
The possibilities for an upcycled DIY water feature are nearly endless, limited only by your imagination and the items you can find. Here are just a few ideas to get your creative juices flowing. You could use old ceramic pots of different sizes, stacking them so water trickles from the top one down to the largest at the bottom. This creates a lovely tiered effect, which is quite popular, you know.
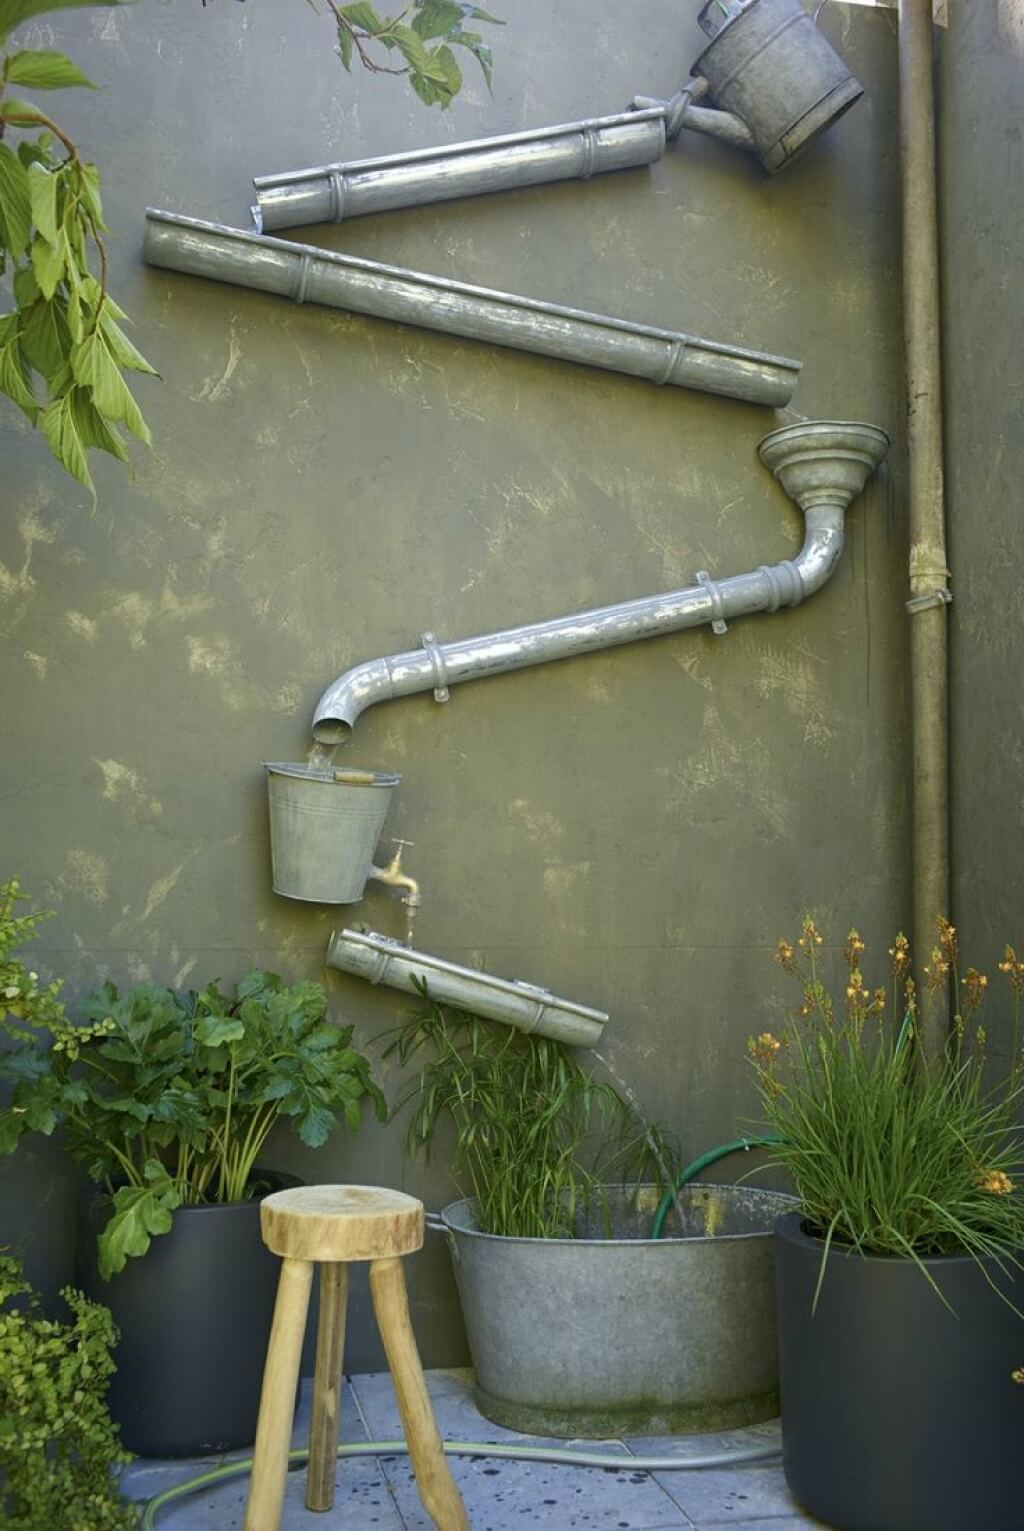
An old watering can, perhaps a rusty metal one, can make a charming focal point. You could have the water pour from its spout into a basin below. Or, for something a bit more rustic, consider an old whiskey barrel or a large wooden crate lined with pond liner. Water could bubble up from inside, overflowing gently, creating a very natural sound. This is a pretty simple idea, but very effective.
For a quirky touch, what about an old teapot and teacups? You could arrange them to create a whimsical cascading fountain. Even old glass bottles, carefully cut or arranged, can make a unique display as water flows over them. Think about old metal buckets, galvanized tubs, or even discarded sinks. These can all be transformed into beautiful water features with a little bit of work and some clever arrangement, so it’s worth looking at things differently.
Creative Material Combinations
Don't be afraid to mix and match different materials. A metal basin paired with smooth river stones and a piece of driftwood can create a very calming, natural look. Or, perhaps old terracotta pipes, stacked and sealed, could form an interesting modern sculpture that water flows through. You might even find old glass insulators or decorative bottles that can be incorporated into the design, letting light play through the water. This combination of textures and materials often yields the most interesting results, in a way.
Consider using old garden tools, like a shovel head or a rake, as part of the structure, letting water drip or flow off them. An old bicycle wheel could be adapted to slowly turn with the water, adding a kinetic element. The key is to see the potential in items that might otherwise be discarded. You're not just making a water feature; you're creating a piece of art that happens to have water flowing through it. This is where the "higher value" aspect of upcycling really comes to life, actually.
Even something as simple as a collection of mismatched ceramic bowls or plates can be stacked and sealed to create a charming, multi-level fountain. Just remember to ensure all connections are watertight and that the pump is correctly sized for the lift and flow you want. A little bit of planning and a lot of imagination will lead you to some truly amazing results. It's quite rewarding, you'll find, to bring these old things back to life.
Making It Flow: The Pump and Plumbing
The heart of any water feature is the pump. This little device circulates the water, making it flow and creating that soothing sound. When choosing a submersible pump, consider the "head height" – this is how high the pump can push water. If your feature is tall, you'll need a pump with a higher head height. You also want to think about the "flow rate," which is how much water the pump moves per hour. A higher flow rate means more vigorous water movement. Most pump packaging will have this information, so it's good to check that.
Once you have your pump, you'll need to connect it to your water outlet using tubing. The tubing usually attaches to a fitting on the pump. You'll then run this tubing up through your upcycled materials to the point where you want the water to emerge. This might involve drilling holes in your containers or finding clever ways to hide the tubing. Make sure the tubing is snug and secure on the pump fitting to prevent leaks, which is pretty important.
For outdoor features, you'll need an outdoor-rated electrical outlet that's protected from the elements, perhaps a GFI (Ground Fault Interrupter) outlet for safety. For indoor features, a standard outlet will do, but always keep electrical cords away from water. It's a very good idea to test your pump and water flow before you finalize your setup, just to make sure everything works as you expect. This helps avoid any unexpected issues later on, you know.
Assembly Tips
When putting your upcycled DIY water feature together, sealing is key. Any joints or connections where water might escape need to be completely watertight. Use a good quality waterproof silicone sealant or pond sealer. Apply it generously and let it cure fully according to the product instructions. This step is incredibly important for preventing leaks and keeping your water feature running smoothly. A little patience here saves a lot of trouble, so take your time.
If you're stacking items, make sure they are stable. You might need to use strong, waterproof adhesive or even drill and bolt pieces together for larger, heavier constructions. Consider using small shims or leveling feet to ensure your feature sits evenly. This helps with water flow and prevents tipping. Adding decorative stones or pebbles to the base can also help stabilize lighter structures and hide the pump and tubing. This also adds a nice visual touch, too it's almost a bonus.
Remember to leave an access point for the pump so you can clean it or replace it if needed. This might mean having a removable top layer or a section that can be lifted. Planning for maintenance from the start makes things much easier down the road. Once everything is assembled and sealed, fill it with water, plug it in, and enjoy the calming sounds! It's a pretty satisfying moment, you'll find, when it all comes together.
Care and Keeping of Your Eco-Friendly Fountain
Keeping your upcycled DIY water feature running well means a little bit of regular care. The most important thing is to keep the water clean. Algae can grow, especially in sunny spots, and debris like leaves or dust can collect. Regularly check the water level and top it up, as water will evaporate, particularly on warm days. You don't want your pump running dry, as that can damage it, which is something to avoid.
Cleaning the pump is also very important. Over time, sediment and debris can clog the pump's intake, reducing its efficiency. Follow the manufacturer's instructions for cleaning your specific pump, but generally, it involves unplugging it, taking it apart, and rinsing out any gunk. This should be done every few weeks or months, depending on how much debris gets into your water. This simple step really extends the life of your pump, you know.
For outdoor features, consider draining them for the winter if you live in a cold climate. Freezing water can crack containers and damage pumps. Store the pump indoors in a bucket of water or according to its instructions. For indoor features, regular water changes can help keep the water fresh and prevent odors. You can also use non-toxic, pet-safe water feature cleaners if algae becomes a persistent issue. It's all about a little bit of attention, really.
Troubleshooting Common Issues
If your upcycled DIY water feature stops flowing, don't panic. The first thing to check is the water level. If it's too low, the pump might not be able to draw water. Top it up and see if that fixes it. Next, check the pump itself. Is it plugged in? Is it making any noise? Sometimes, the intake might be clogged, so try cleaning it. You can learn more about water pump maintenance on our site, which might help.
If the water flow is weak, it could be a partially clogged pump or tubing. Try cleaning both. If the pump is old, it might just be losing its power and need replacing. Leaks are another common issue. Carefully inspect all seams and connections. You might need to reapply sealant to any problem areas. Sometimes, a tiny crack can appear, especially in older materials, so look closely. Finding the source of a leak can be a bit of a detective job, actually.
If the water gets cloudy or smells bad, it's usually a sign that it needs cleaning or a full water change. Make sure there isn't too much organic matter (like leaves) sitting in the water. For persistent algae, consider moving your feature to a shadier spot or using an appropriate algaecide. Keeping an eye on these things helps a lot, you know, to keep your feature looking good and sounding nice. For more tips on keeping your water feature sparkling, you might want to link to this page .
Frequently Asked Questions About Upcycled Water Features
People often have questions when they think about making their own water feature. Here are some common ones:
Is it hard to make an upcycled water feature?
Not at all! Many upcycled DIY water features are quite simple to put together, especially if you start with basic designs. The main steps involve choosing your materials, ensuring they hold water, adding a pump, and connecting the tubing. It's more about being creative and willing to try, rather than needing special skills. With a little bit of planning and patience, most people can create a lovely one, so it's very doable.
What materials can I use for an upcycled water feature?
You can use so many different things! Think about old ceramic pots, metal buckets, watering cans, glass bottles, teapots, old tires (cleaned and sealed), wooden barrels (lined), or even discarded sinks. The key is that the material can either hold water or be made waterproof with a liner. Really, almost anything that can be adapted to hold or channel water is fair game, which is pretty exciting.
How do I keep my DIY water feature clean?
Keeping it clean is pretty straightforward. Regularly check and top up the water level to prevent the pump from running dry. Clean the pump filter and impeller every few weeks or months to remove debris and sediment. If algae grows, you can gently scrub it away or use a safe algaecide. Changing the water completely every so often also helps keep it fresh. It's just a little bit of routine care, honestly.
Your Creative Splash
Making an upcycled DIY water feature is a wonderful project that brings together creativity, environmental care, and the joy of making something with your own hands. It's a chance to give forgotten items a new life, transforming them into something beautiful and calming for your space. As of today, June 17, 2024, the interest in sustainable home projects continues to grow, making this a timely and rewarding endeavor. You're not just building a fountain; you're crafting a personal oasis, a place of peace, and a testament to clever reuse. We hope these ideas give you a good start on your own unique creation. It's a pretty satisfying feeling, watching that water flow, knowing you made it happen.

Detail Author:
- Name : Mandy Bartoletti I
- Username : qlindgren
- Email : liliane.mckenzie@gmail.com
- Birthdate : 2004-08-14
- Address : 22610 Shields Viaduct South Evans, ID 88538
- Phone : 331-412-0899
- Company : Windler-Heaney
- Job : Healthcare Support Worker
- Bio : Deserunt mollitia qui et earum sit. Deserunt voluptate sit amet quibusdam a dignissimos. Sit provident molestiae pariatur commodi. Quas ratione quaerat unde magni in. Alias eos et dolore id.
Socials
linkedin:
- url : https://linkedin.com/in/boganc
- username : boganc
- bio : Dolor et totam quod delectus.
- followers : 4910
- following : 1488
twitter:
- url : https://twitter.com/caterina1107
- username : caterina1107
- bio : Est cumque similique reiciendis. Officia fugiat quo perferendis odit dolorem ducimus. Pariatur non nulla porro iure. Non dolorem eligendi et voluptatibus.
- followers : 2820
- following : 598
instagram:
- url : https://instagram.com/cbogan
- username : cbogan
- bio : Nam alias aut laborum et iure neque. Consequatur sed dolor culpa in.
- followers : 2475
- following : 2915
