
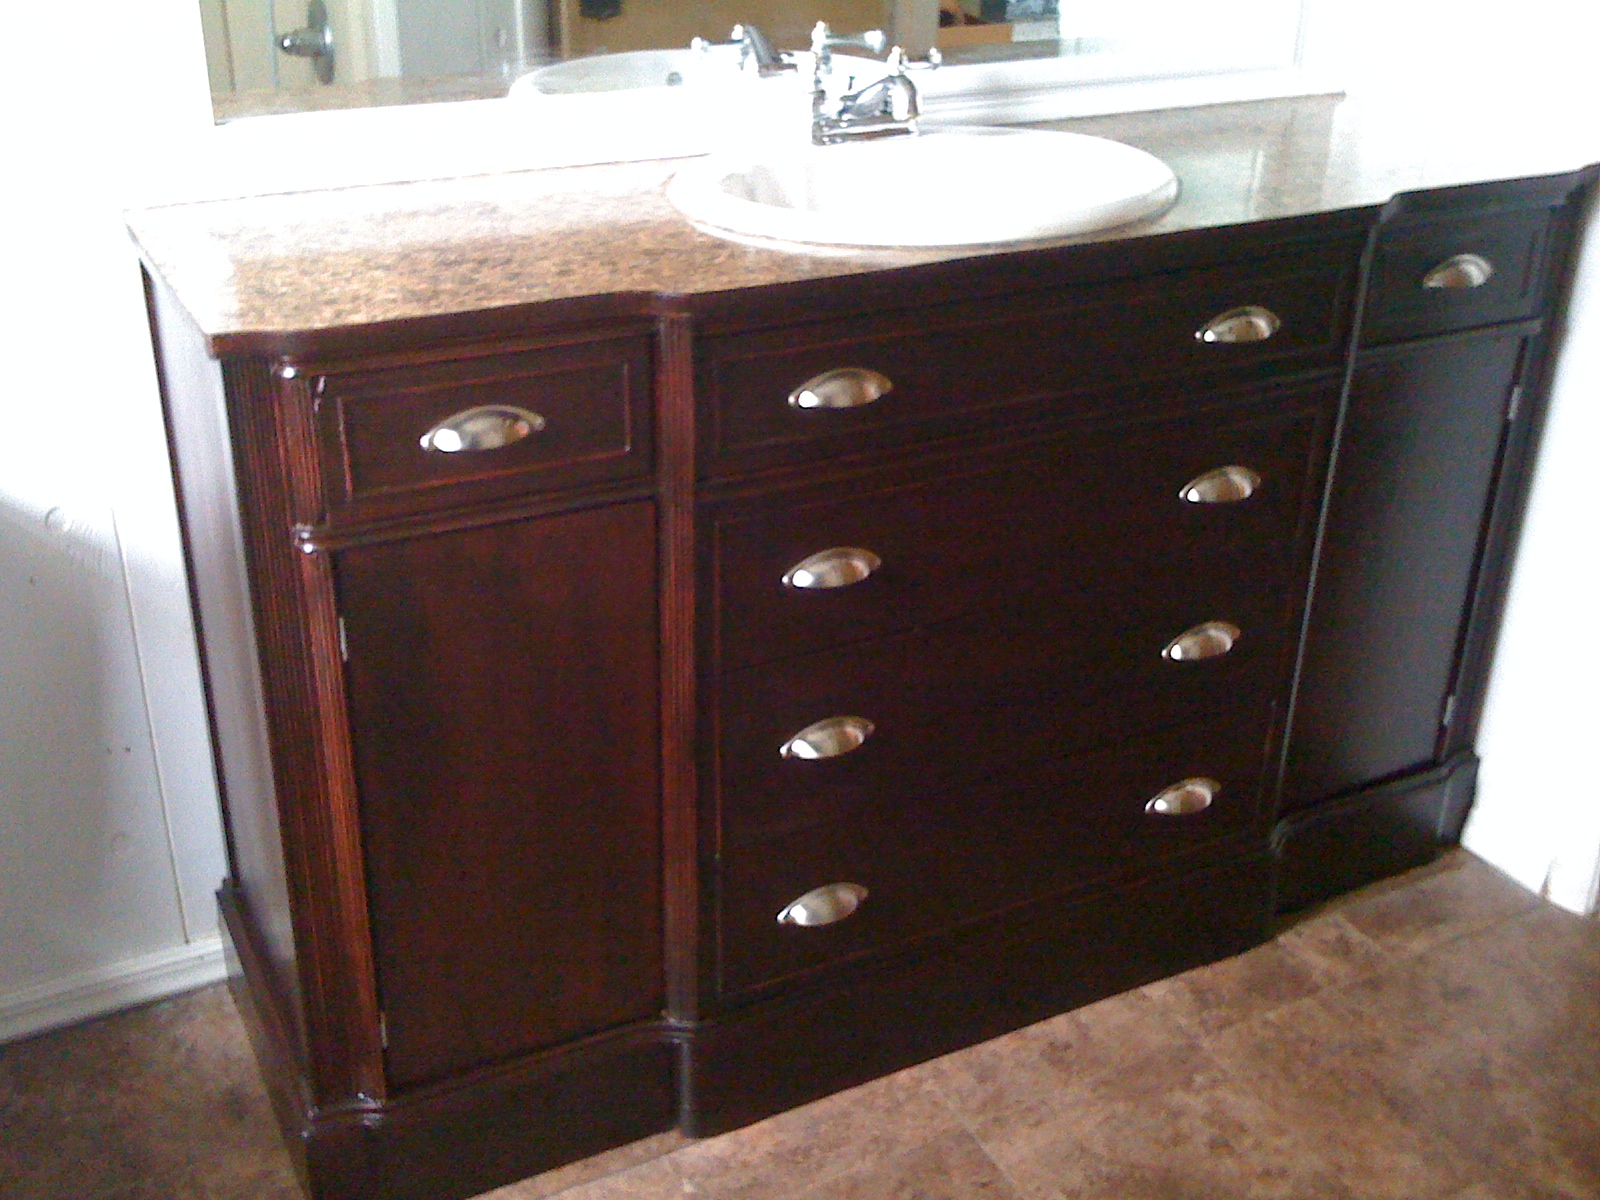
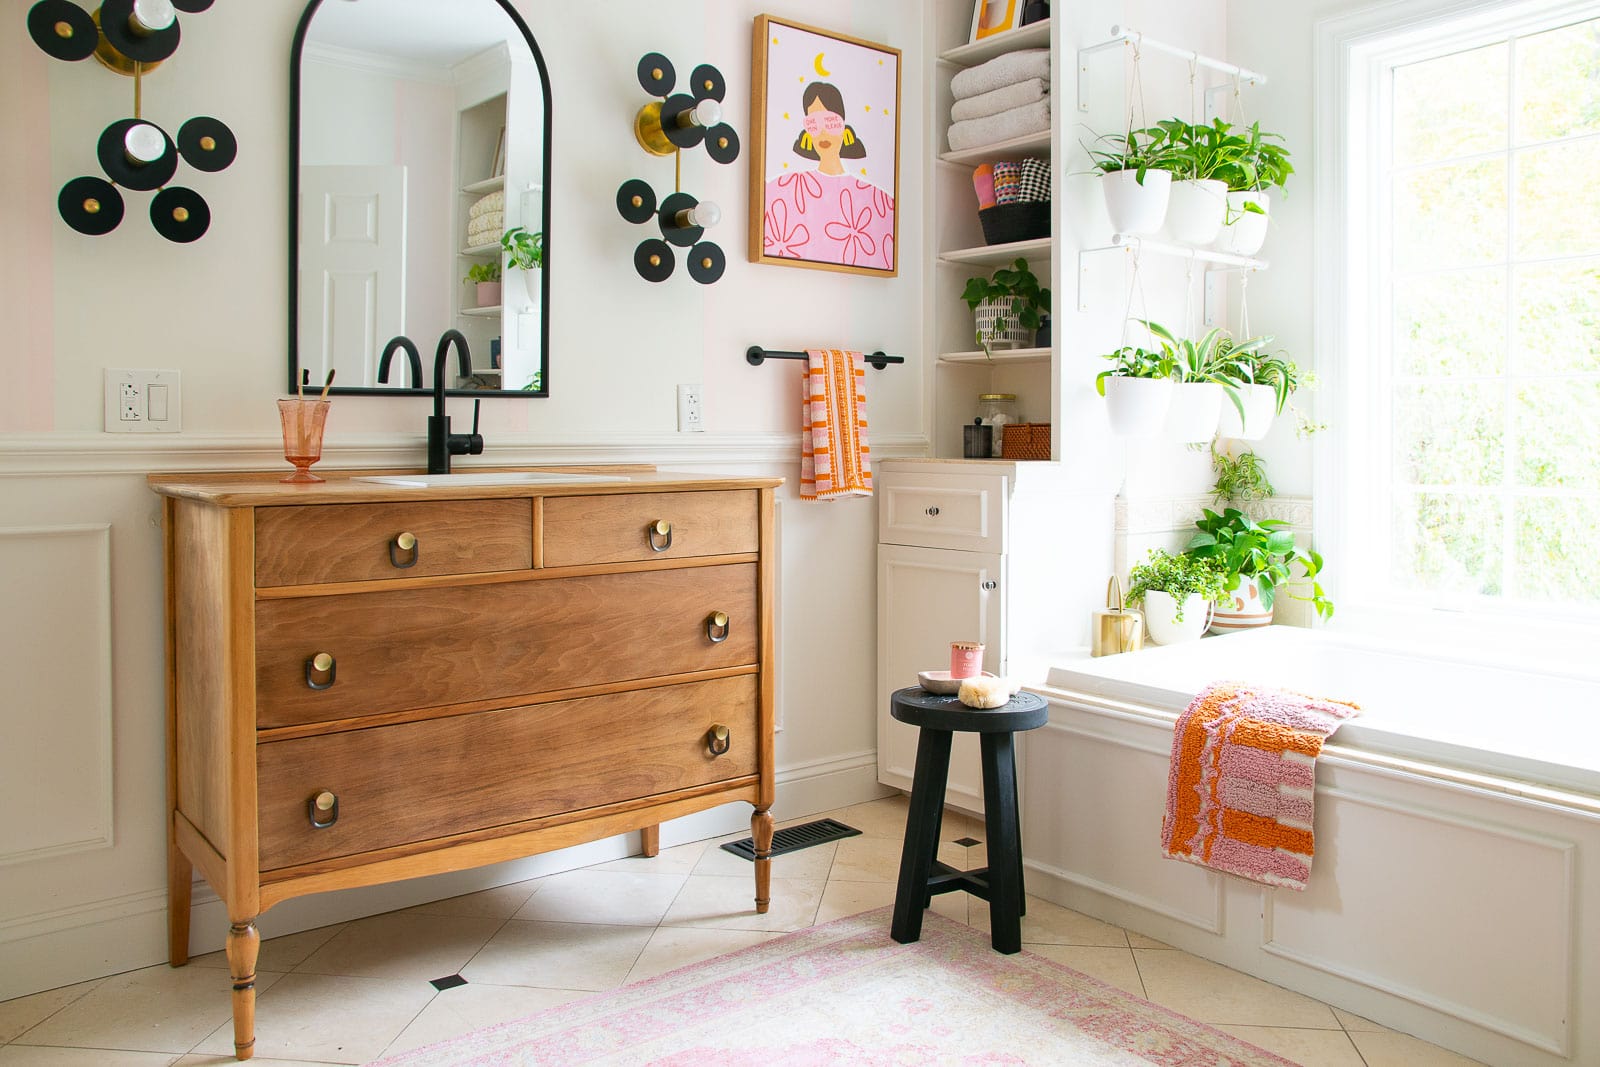
Imagine walking into your bathroom, and there it is: a beautiful, unique vanity that tells a story, something truly special. This isn't just any piece of furniture; it's a repurposed buffet, given a whole new life. It’s a smart way to add character and function to your space, and it really makes a statement. People are always looking for ways to make their homes feel more personal, and this kind of project fits that desire perfectly.
Giving an old piece of furniture a new purpose, like turning a buffet into a bathroom vanity, is a fantastic idea for many reasons. It saves money, for one thing, compared to buying a brand-new, often generic, vanity from a big box store. Plus, it is a wonderful way to keep beautiful, well-made items out of landfills, which is something many folks care about deeply these days. You get to express your personal flair, too, creating something that no one else has.
This approach to home improvement is a bit like an evolution, if you think about it. Just as a place like Turning Stone has seen its spaces expand and grow, adding new hotels and conference areas to become something bigger and more, a simple buffet can also experience its own significant change. It moves from serving food to holding your sink and toiletries, becoming a central point in your bathroom. It’s a wonderful way to make something old feel very, very new again.
Table of Contents
- Why Choose a Buffet for Your Vanity?
- Finding the Perfect Buffet
- Planning Your Bathroom Vanity Conversion
- Tools and Materials You'll Need
- Step-by-Step Guide to Converting Your Buffet
- Common Questions About Buffet Vanity Conversions
- Giving Your Bathroom a New Heart
Why Choose a Buffet for Your Vanity?
Picking a buffet for your bathroom vanity is a choice that brings a lot of good things to the table, so to speak. First off, you get a piece that is truly one of a kind. You won't find this same look in every home you visit, which is nice. It really adds a sense of history and character that new pieces just can't quite match.
Then there's the cost factor. Buying a custom vanity or even a high-end store-bought one can get pretty expensive, you know? Repurposing a buffet you find at a flea market or an antique shop is often much, much more affordable. You save money, and you get something that looks a million times better.
It's also a very eco-friendly choice. By giving an old piece of furniture a new life, you're keeping it out of the landfill. This kind of upcycling is something many people feel good about, and it helps reduce waste. It’s a win for your wallet and a win for the planet, too.
Finding the Perfect Buffet
Finding the right buffet is, arguably, one of the most exciting parts of this whole project. You want something that speaks to you, but also something that will work well in a bathroom setting. Think about where you'll look: antique stores, thrift shops, online marketplaces, or even a family attic.
Size and Space Considerations
Before you even start looking, measure your bathroom space very carefully. You need to know how wide, deep, and tall your new vanity can be. Buffets come in all sorts of sizes, so finding one that fits just right is pretty important. Remember to account for door swings and any other fixtures nearby.
Consider the depth, too. A buffet that's too deep might stick out into the room too much, making the bathroom feel cramped. A standard vanity depth is usually around 21-22 inches, so try to find a buffet that's somewhat close to that, or one you can adjust if needed. It’s a bit of a balancing act, you see.
Material and Condition Matters
Most buffets are made of wood, which is great, but you'll want to check its condition. Look for solid wood construction; veneers can be tricky to work with, especially when you're cutting holes for a sink. Check for any wobbly legs, loose joints, or significant water damage. A little wear and tear is fine, even desirable for character, but major structural issues mean more work for you.
Hardwoods like oak, maple, or cherry are generally more durable and handle moisture better than softer woods. If the piece has any existing finishes, think about how easy it will be to strip or sand them down. Sometimes, a piece just needs a good cleaning and a fresh coat of paint or sealer, which is a lot easier, naturally.
Planning Your Bathroom Vanity Conversion
Once you have your buffet, it’s time to start planning the conversion itself. This stage involves some thinking about how everything will fit together, especially the plumbing. It’s like mapping out a golf course, where every hole needs careful thought for the best play, you know?
Sink and Faucet Selection
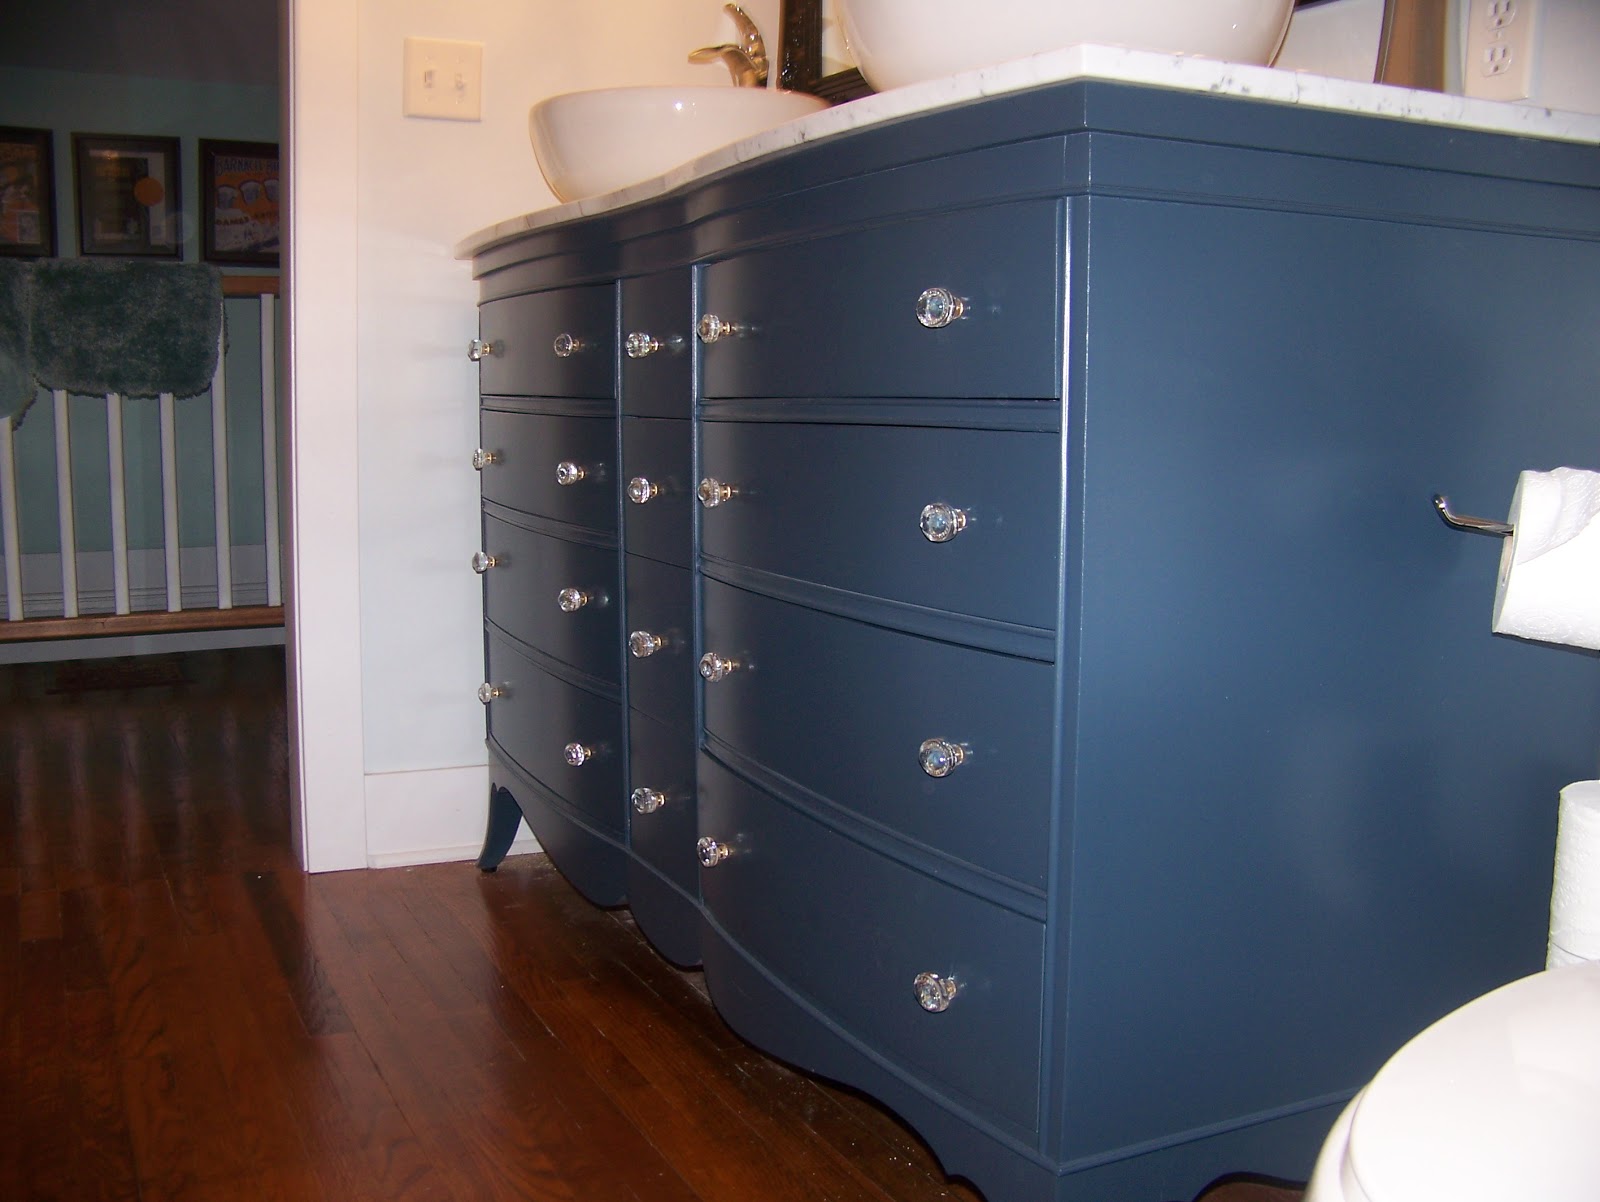
The type of sink you choose will really shape the project. You could go with a vessel sink, which sits on top of the buffet, or an undermount sink, which goes underneath the counter. Each has its own look and needs different cuts in the buffet's top. Vessel sinks are often easier for DIYers because they require a smaller hole for the drain.
Your faucet choice also matters. Wall-mounted faucets look sleek but need more involved plumbing work. Deck-mounted faucets, which sit on the buffet top, are usually simpler to install. Make sure the faucet you pick is compatible with your chosen sink and that it will fit on the buffet top without looking crowded.
Plumbing Access and Drainage
This is where things can get a little tricky, honestly. You'll need to figure out where your existing water lines and drain pipe are in the bathroom. Then, you'll need to make sure the buffet can accommodate these. This might mean cutting out the back panel of the buffet, or even some of the shelves or drawers inside, to allow pipes to pass through.
Think about how the P-trap will fit under the sink and connect to the wall drain. Sometimes, you might need to adjust the height of the interior shelves or even remove them entirely to make room for the plumbing. It’s a bit like playing a game of Tetris, making sure everything lines up just so.
Tools and Materials You'll Need
To get this project done, you'll need a collection of tools and some specific materials. Having everything ready before you start will make the process much smoother. It’s like preparing for a big concert; you need all your instruments and equipment set up just right.
- Measuring Tools: Tape measure, ruler, pencil, carpenter's square.
- Cutting Tools: Jigsaw (for sink cutout), circular saw or hand saw (for back panel/shelves), drill with various bits (for faucet holes, pilot holes).
- Sanding Supplies: Sandpaper (various grits), orbital sander or sanding block.
- Finishing Supplies: Wood filler, wood glue, primer, paint or stain, waterproof sealer (polyurethane or marine varnish).
- Plumbing Supplies: Sink, faucet, drain assembly, P-trap, supply lines, shut-off valves, silicone caulk (waterproof).
- Hardware: New knobs or pulls (if desired), drawer slides (if replacing).
- Safety Gear: Safety glasses, dust mask, gloves.
- Other: Drop cloths, rags, painter's tape, level.
Step-by-Step Guide to Converting Your Buffet
Now for the real fun part: getting your hands dirty and bringing your vision to life. This is where your buffet starts its transformation, step by step. It's a bit like how a casino evolves, adding new games and experiences over time.
Prepare the Buffet for Its New Role
First, give the buffet a really good cleaning. Use a mild cleaner to remove any dirt, grime, or old polish. Take out all the drawers and remove any existing hardware like knobs or pulls. You want a clean slate to work with, you know?
Next, sand the entire piece. Start with a medium-grit sandpaper (like 120-grit) to remove any old finish or smooth out imperfections. Then, move to a finer grit (like 220-grit) for a super smooth surface. This step is pretty important for paint or stain to stick well. If there are any holes or cracks, fill them with wood filler and let it dry, then sand it smooth.
If the buffet feels a bit wobbly, now is the time to reinforce it. Use wood glue and clamps to tighten any loose joints. You might even add some L-brackets inside for extra stability, especially if it’s an older piece. This makes sure your vanity is very solid.
Making the Cuts for the Sink
This step needs careful measuring, honestly. Place your sink on the buffet top exactly where you want it. If it’s an undermount sink, trace the inner rim of the sink. If it’s a vessel sink, trace the outline of the drain hole. Double-check your measurements, then check them again.
Use a drill to make a pilot hole inside your traced line, big enough to fit your jigsaw blade. Carefully cut along your traced line with the jigsaw. Take your time, moving slowly and steadily. For a vessel sink, you’ll also need to drill a hole for the faucet if it's deck-mounted. Make sure the faucet hole is positioned correctly for the sink and handles.
You’ll also need to cut out sections of the back panel of the buffet to allow for plumbing. Measure where your water lines and drain pipe come out of the wall, and transfer those measurements to the buffet’s back. Cut out the necessary openings using a jigsaw or circular saw. You might also need to cut notches in internal shelves or drawer backs to make way for the pipes.
Waterproofing and Protecting the Wood
This is a very, very crucial step for a bathroom vanity. Wood and water don't mix well over time, you see. Apply a wood sealer or primer to all surfaces, especially the cut edges around the sink and any areas that might get splashed. This helps prevent moisture from seeping into the wood.
Once the primer is dry, apply your chosen paint or stain. If you're painting, use a high-quality paint designed for bathrooms or kitchens, as these are more resistant to moisture and mildew. Apply several thin coats, letting each coat dry completely between applications.
After the paint or stain is dry, apply multiple coats of a waterproof topcoat. A marine varnish or a good quality polyurethane is a great choice. Make sure to cover all surfaces, including the inside of the sink cutout and the edges. This creates a protective barrier against water damage, which is pretty important for a long-lasting vanity.
Installing the Plumbing and Fixtures
Now you’re ready to put the sink and faucet in place. Apply a bead of silicone caulk around the edge of the sink cutout (for undermount sinks) or around the drain hole (for vessel sinks) to create a watertight seal. Carefully lower the sink into place and secure it according to the manufacturer's instructions.
Install the faucet next. Feed the supply lines and mounting hardware through the holes you drilled. Tighten the nuts underneath to secure the faucet. Connect the water supply lines to the shut-off valves coming from the wall.
Finally, connect the drain assembly to the sink, then attach the P-trap, and connect it to your wall drain pipe. Make sure all connections are tight and secure. Turn on the water slowly and check for any leaks. It’s a good idea to have a bucket handy, just in case.
Adding the Finishing Touches
Once the plumbing is all set, you can put the drawers back in and attach any new hardware you’ve chosen. New knobs or pulls can really change the look of the piece, giving it a fresh feel. Adjust the drawers to make sure they open and close smoothly.
Consider adding drawer organizers or small bins inside the drawers to keep your bathroom items neat and tidy. You could also line the drawers with a pretty contact paper for a finished look. These small details can really make a big difference, you know?
Common Questions About Buffet Vanity Conversions
People often have similar questions when thinking about this kind of project. Here are some of the most common ones.
Can any buffet be turned into a bathroom vanity?
Not every buffet is a perfect fit, honestly. The best ones are usually solid wood, rather than particle board or thin veneers, because they handle moisture better and are easier to cut. You also need to consider the size and shape to make sure it fits in your bathroom and can hold a sink without looking awkward.
How do I protect the wood from water damage?
Protecting the wood is very important. You need to use a good quality waterproof sealer, like a marine varnish or a durable polyurethane, on all surfaces, especially the top and around the sink cutout. Applying several thin coats is much better than one thick one. Some people even add a glass or stone top for extra protection, which is pretty smart.
Do I need professional help for the plumbing?
If you're comfortable with basic plumbing, you might be able to do it yourself. Connecting a sink and faucet isn't super complicated for many people. However, if you're not sure about it, or if your existing plumbing needs significant changes, it's probably a good idea to call a licensed plumber. They can make sure everything is installed correctly and safely, which is something you really want.
Giving Your Bathroom a New Heart
Turning a buffet into a bathroom vanity is a truly rewarding project. It lets you create a space that is both functional and full of personal style. It's a way to give an old piece of furniture a second chance, making it the star of your bathroom. This kind of transformation is pretty satisfying, you know?
It’s a bit like finding a hidden gem at a casino, or discovering a new favorite dish at an exceptional restaurant. The effort you put in really pays off with a unique result. You get to enjoy something beautiful and practical every single day.
If you're looking for more ideas on how to personalize your home, learn more about home improvement projects on our site. And for more creative ways to refresh your living spaces, be sure to check out this page for unique design concepts.
For more detailed information on various types of wood and their properties, you might find this external resource helpful: The Wood Database.
Detail Author:
- Name : Alice Howe
- Username : hester.schulist
- Email : mschowalter@bode.info
- Birthdate : 1979-08-06
- Address : 31242 Eric Lock Rexborough, NH 02162-4652
- Phone : 1-463-926-5764
- Company : Konopelski Inc
- Job : Head Nurse
- Bio : Reiciendis qui nihil dolor sed inventore minima voluptatem temporibus. Corporis et qui velit et et aut debitis. Aut ipsam nesciunt excepturi perspiciatis delectus. Et quisquam quasi voluptatum sit.
Socials
linkedin:
- url : https://linkedin.com/in/ari1393
- username : ari1393
- bio : Consectetur soluta et ut ut repellat id et.
- followers : 3405
- following : 164
tiktok:
- url : https://tiktok.com/@kunzea
- username : kunzea
- bio : Magnam at ea minima ut ex. Sed itaque eius et.
- followers : 1608
- following : 989
instagram:
- url : https://instagram.com/arikunze
- username : arikunze
- bio : Hic animi aut vitae ratione. Et qui ut saepe et et optio. Consequatur rerum aspernatur quia error.
- followers : 2990
- following : 2138
twitter:
- url : https://twitter.com/ari5726
- username : ari5726
- bio : Libero laudantium repellat ex ut sint libero eligendi. Ab quas possimus nisi voluptas deserunt voluptate. Enim sed modi voluptatum error sed quam.
- followers : 6677
- following : 384
